STEP
01
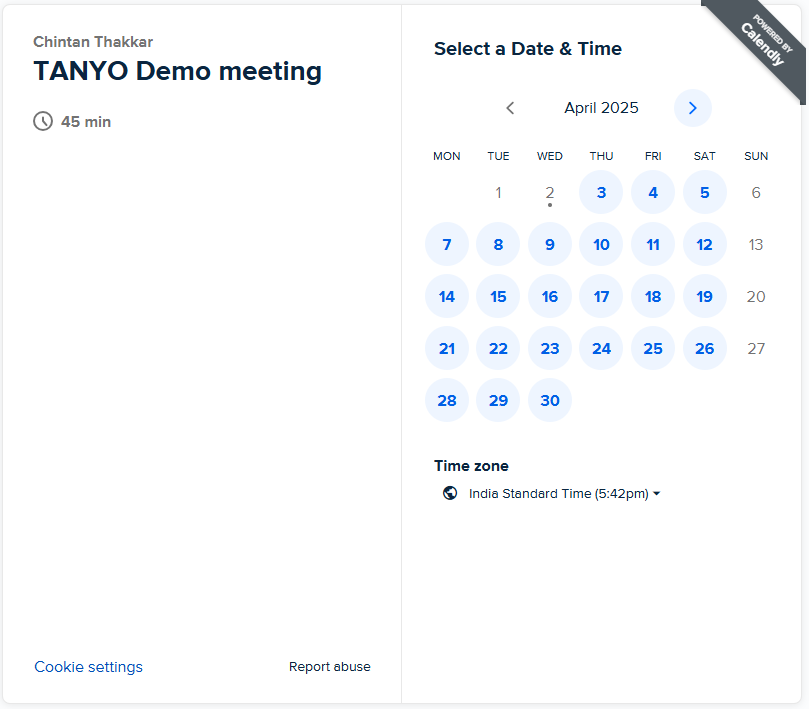
Schedule a Demo
Book a time with our Expert to get an overview and getting started.
02
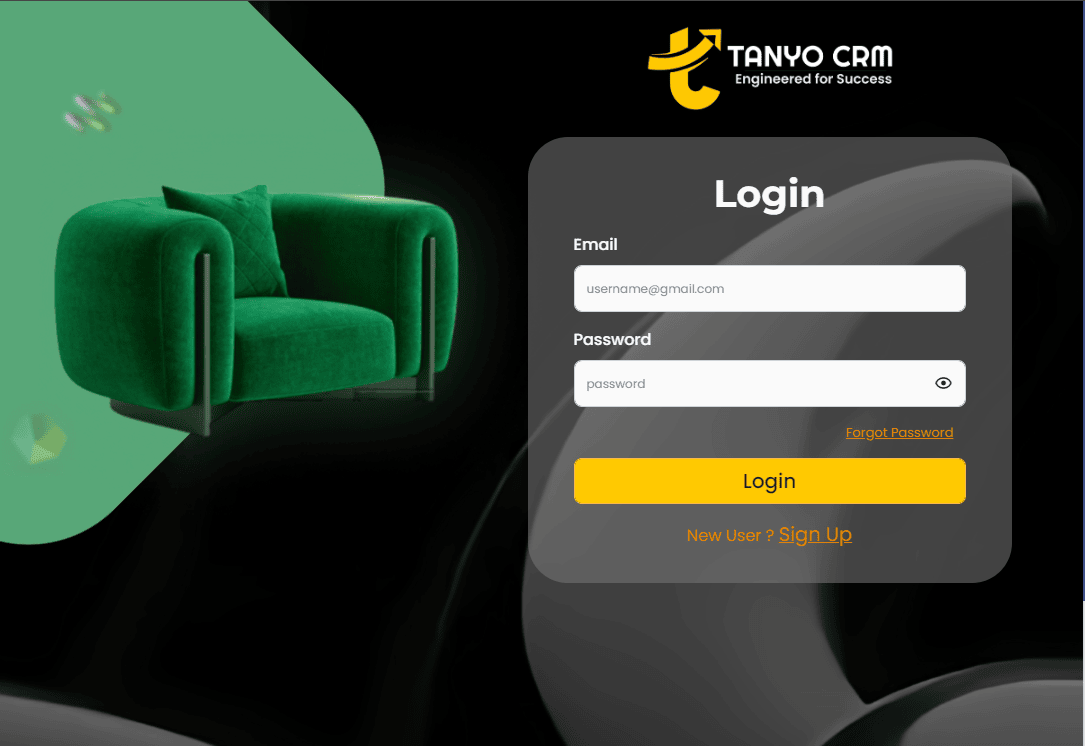
Logging In to Tanyo CRM
There are two convenient ways to access your Tanyo CRM account:
-
Web Portal Login:
- Navigate to the Login Page: Visit the Tanyo CRM login page at https://app.tanyo.in/
- Enter Your Credentials: Enter the email address and password associated with your Tanyo CRM account.
- Sign In: Click the "Sign In" button.
-
Mobile/Tablet App Login:
- For on-the-go access, download the Tanyo CRM app for your mobile device:
- Android Users: Download the app from the Google Play Store by searching for "Tanyo CRM."
- iOS Users: Download the app from the Apple App Store by searching for "Tanyo CRM."
-
Once downloaded, open the app and follow these steps:
- Enter Your Mobile Number: Enter the mobile number registered with your Tanyo CRM account.
- Verify with OTP (One-Time Password): You'll receive a one-time password (OTP) via SMS. Enter the OTP in the app to verify your identity.
- Log In: Click the "Log In" button.
- Note: Your access to Tanyo CRM modules and features depends on your user role and permissions assigned by the account administrator.
03
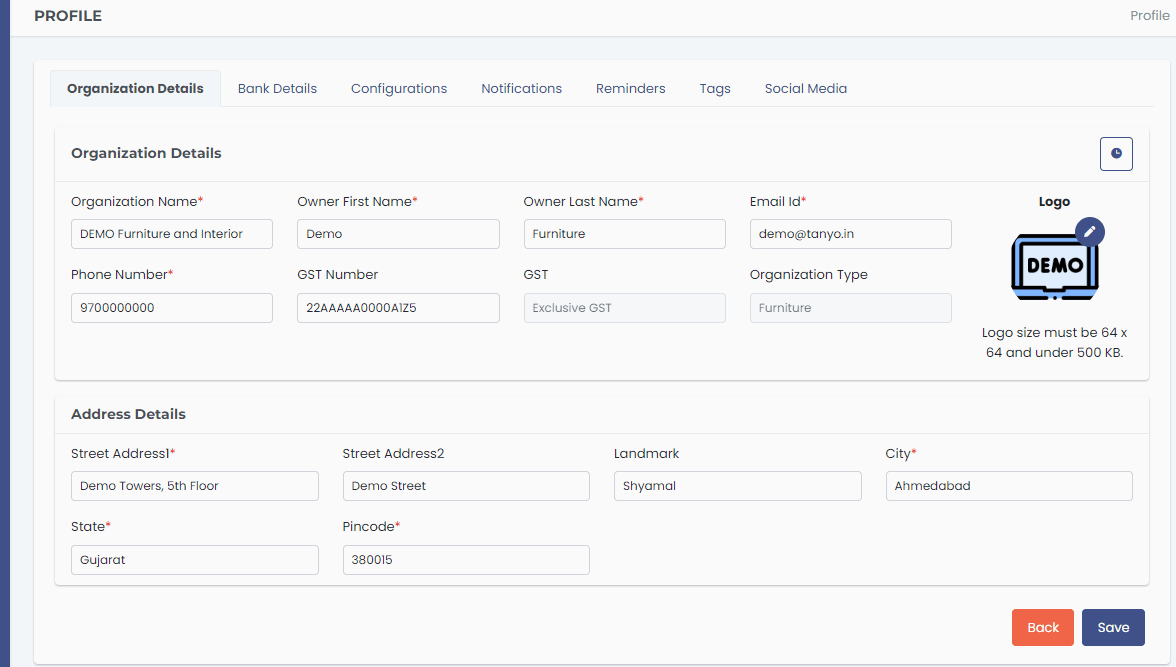
Setting Up Your Tanyo CRM Workspace (Administrator Access)
Once logged in with administrator privileges, you can configure Tanyo CRM to optimize its functionality for your organization. Here's a breakdown of the key configuration steps:
- Company Profile and Branding
- Notification Preferences
- Email Configuration
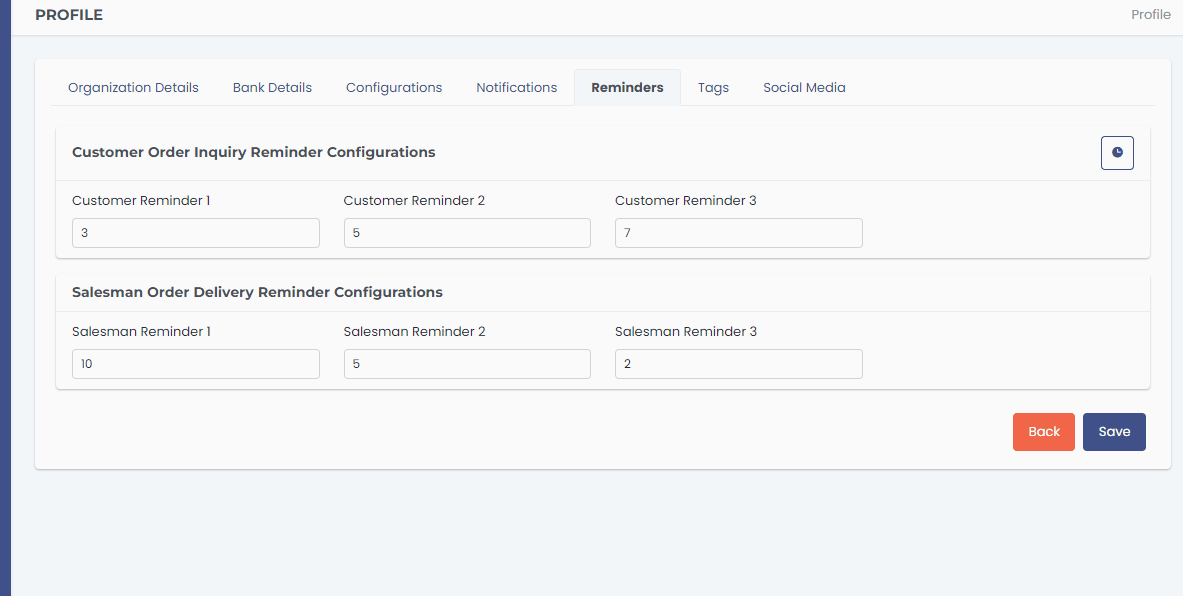
- Sales Follow-up Reminders
- Other configurations (for details contact our Support Team)
04
Creating Product Categories and Masters (Administrator Access)
Before adding individual products to your Tanyo CRM system, it's essential to establish a well-defined product structure. This ensures efficient product management and accurate pricing within your organisation setup.
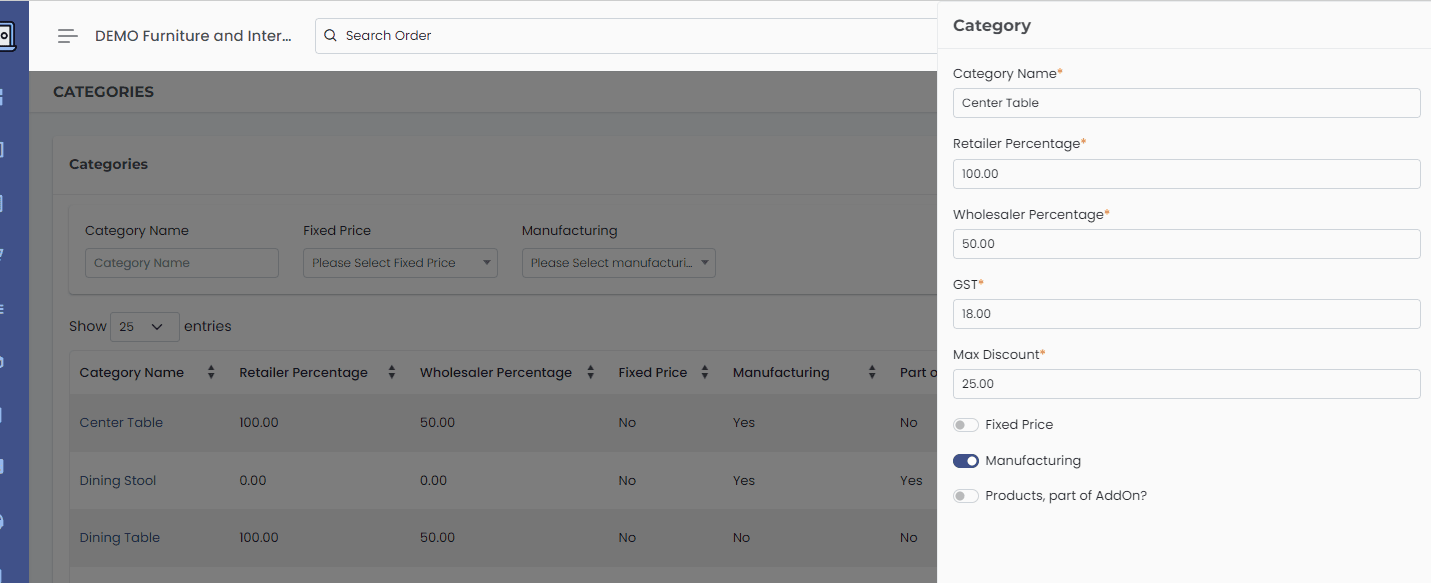
- Product Categories - Organize your products logically by creating categories. Attributes like GST%, Margins etc. apply to all products within a specific category.
- Set default profit margins (as a percentage) for each category. These margins will be added to the product's cost price to determine the final selling price. You can configure separate margins for different sales channels (e.g., wholesale, retail) within a category.
- If you manufacture furniture in-house, you can designate a specific category for "Manufacturing" products. This can help streamline your workflow by automatically routing manufacturing orders to the factory during product creation.
- For products with a fixed cost price that doesn't depend on raw material variations, you can enable the "Fixed Price" flag. This simplifies product creation by setting a single cost price that remains consistent.
- Add Fabrics, Polishes and Raw Materials required.
05
Add Products
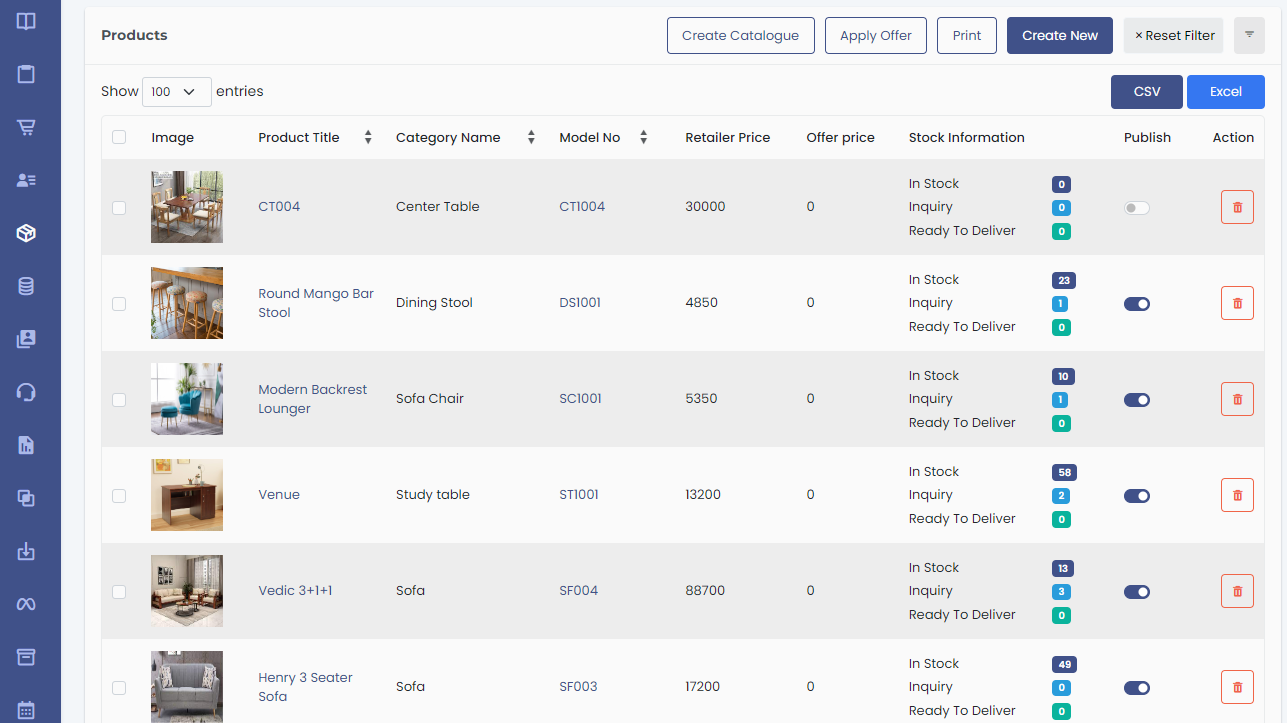
- Navigate to the "Products" section, select the appropriate category for your product and enter a clear and descriptive title for your product.
- Provide a detailed description of your product, highlighting its features and benefits.
- Upload high-quality images to showcase your product from various angles.
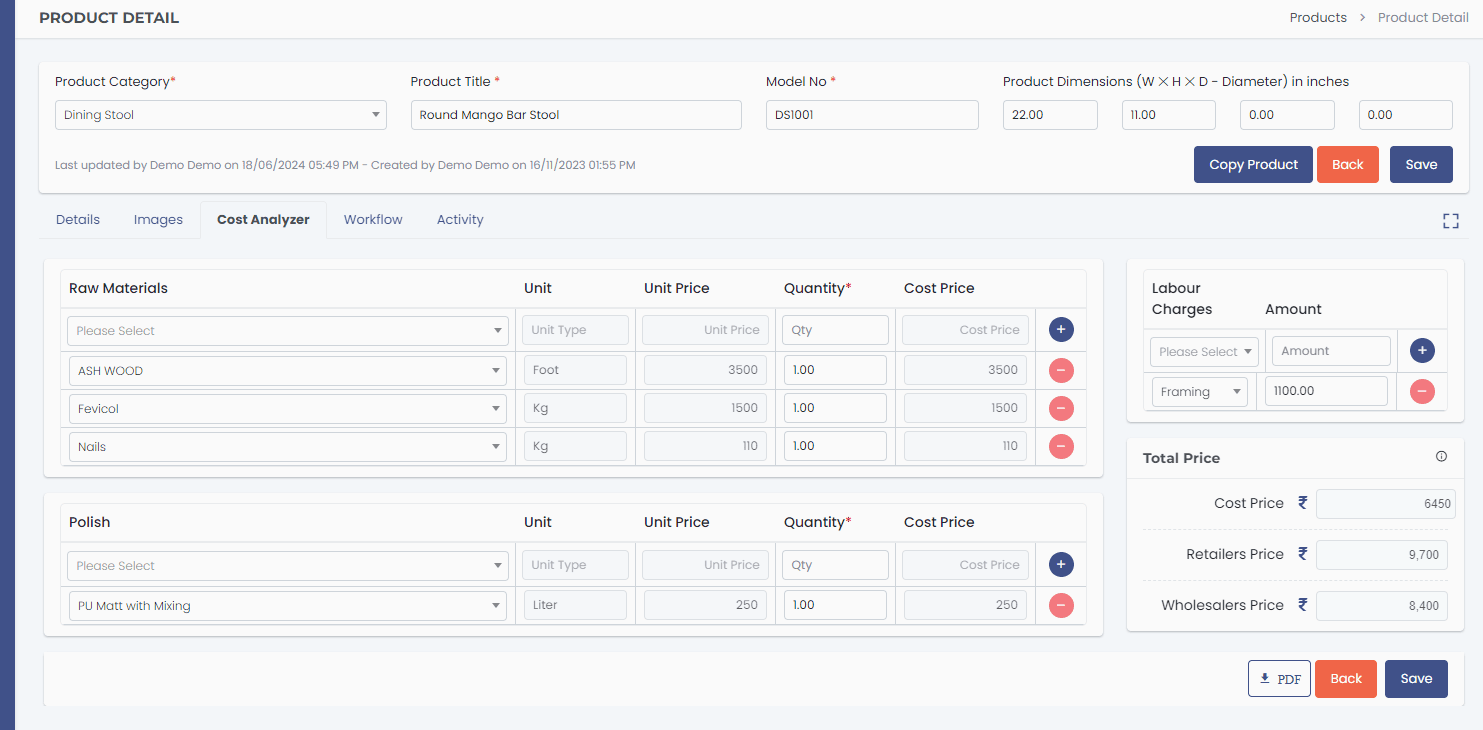
- Utilize the built-in "Cost Analyzer" tool to efficiently list all the raw materials required to manufacture your product. The system calculates the cost price automatically.
- Mark the product as "Published" to make it available for sale.
06
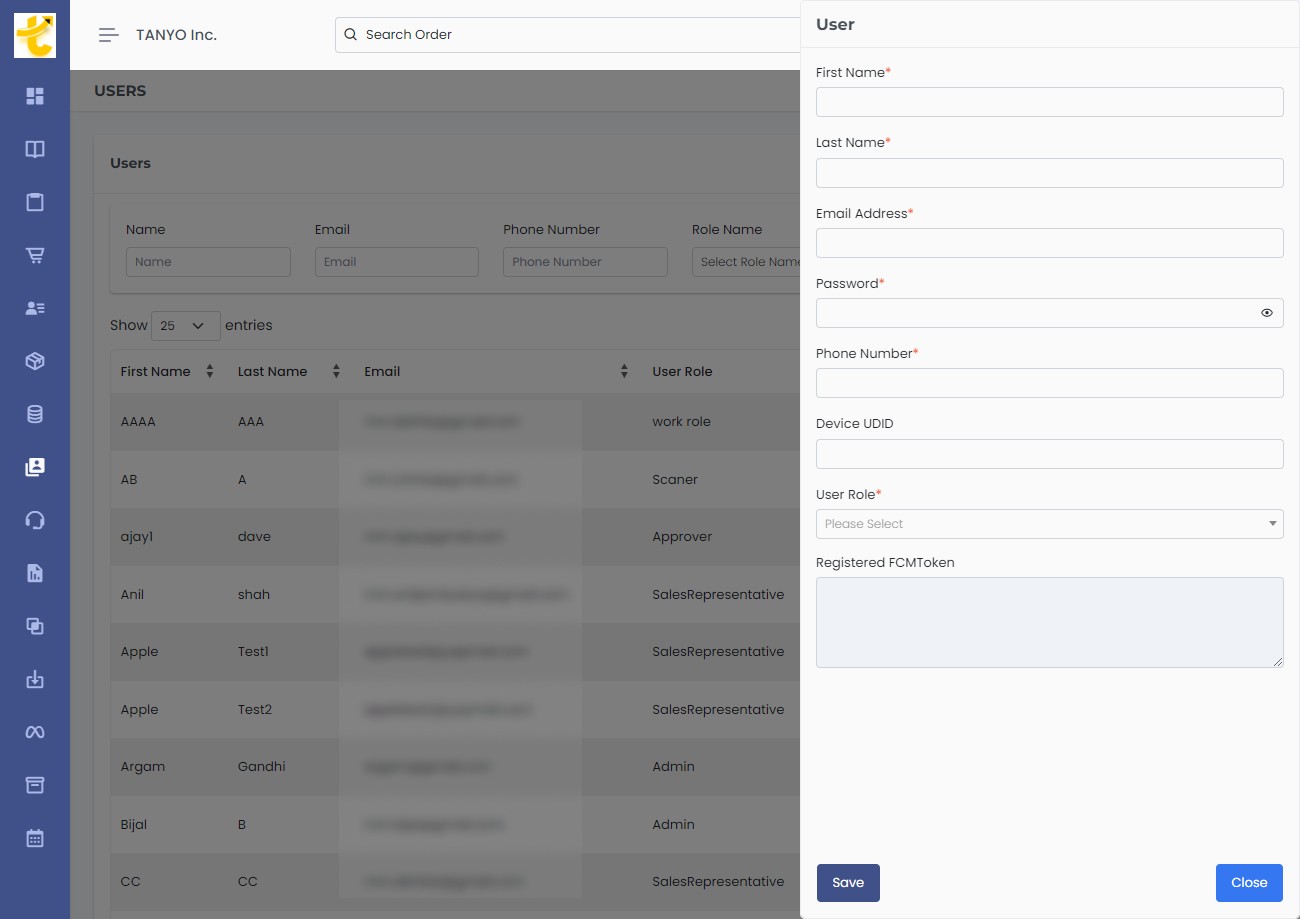
Adding Sales Representatives
This step outlines adding salespeople to your system, allowing them to create quotes using available products on their iPads.
- Go to "Roles" under Users and assign appropriate permissions to modules used by sales team.
- Navigate to "Users." and add new users, specifying their names and mobile numbers. Assign the "SalesRepresentative" role to these users.
- Instruct your sales team to download the "TANYO CRM" app from the Google Playstore (Android) or Apple App Store (iOS).
- Upon launching the app, they will need to use their registered mobile number to log in.
07
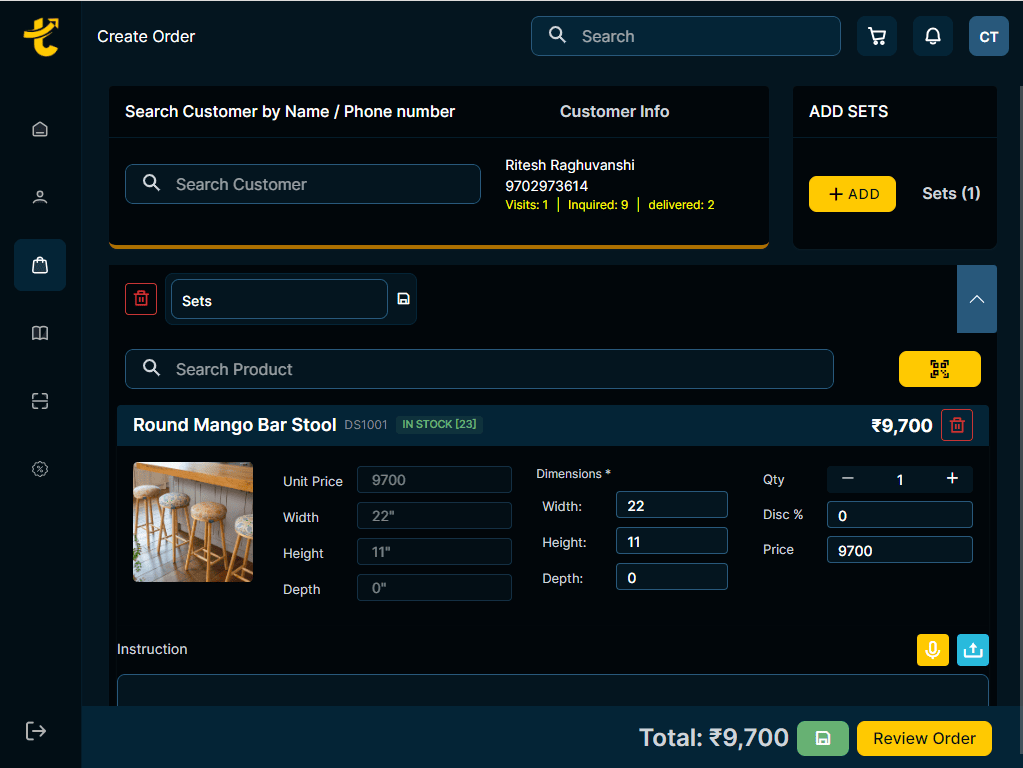
Manage Customers and Generate Quotes
This step empowers your sales team to create quotations for customers using the TANYO CRM iPad app.
- Before creating quotes, ensure customer details are added to the CRM. Access the "Customers" section and add new customers by providing their information.
- To initiate a quote, select the desired customer from the customer list. Start adding products to the quote by browsing the available options.
- Each product displays an image and relevant details for easy reference. Sales representatives can adjust quantities and apply discounts as needed.
- Once complete, the quote can be saved , shared directly with the customer, or sent for internal approvals.